You can update the details of existing members in your BacklinkCRM workspace. There are differences in what you can update depending on whether a member is verified (meaning they have accepted their invitation) or unverified (meaning they have not yet accepted).
Important Notes on Updating Members:
#
- Owner Limitations: An Owner cannot change their own role until they have transferred ownership of the workspace to another member.
- Admin Permissions: An Admin can edit the details of an unverified Admin member. However, an Admin cannot update the information of a verified Admin member.
- Member Limitations: Members do not have the permission to edit or update any member’s information.
Steps to Update a Member: #
Access the “Update Member” Page: #
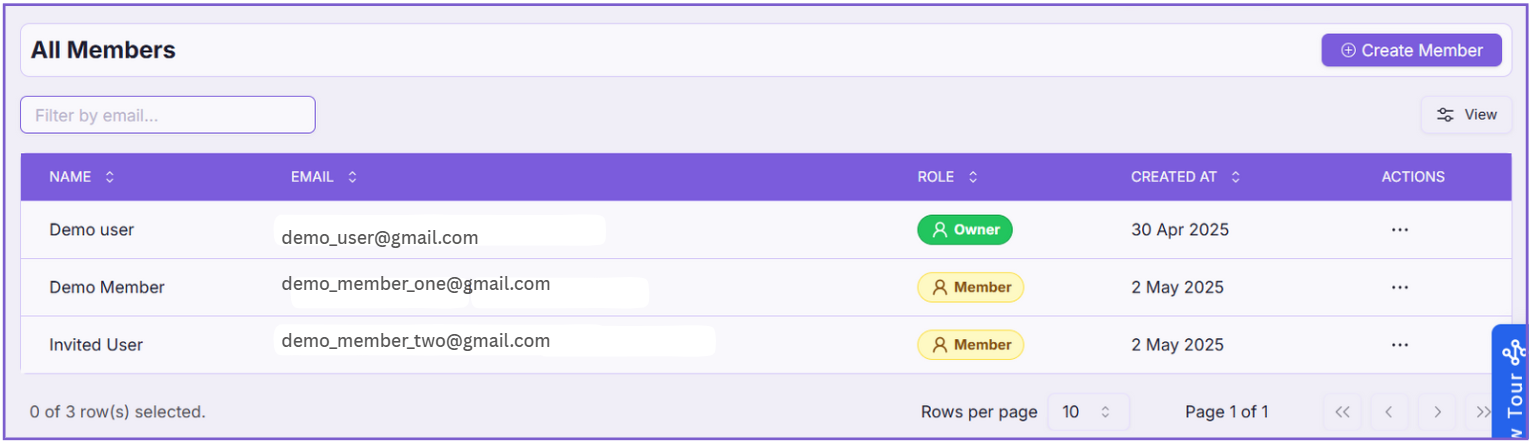
- Go to the Members section by clicking on Members in the sidebar.
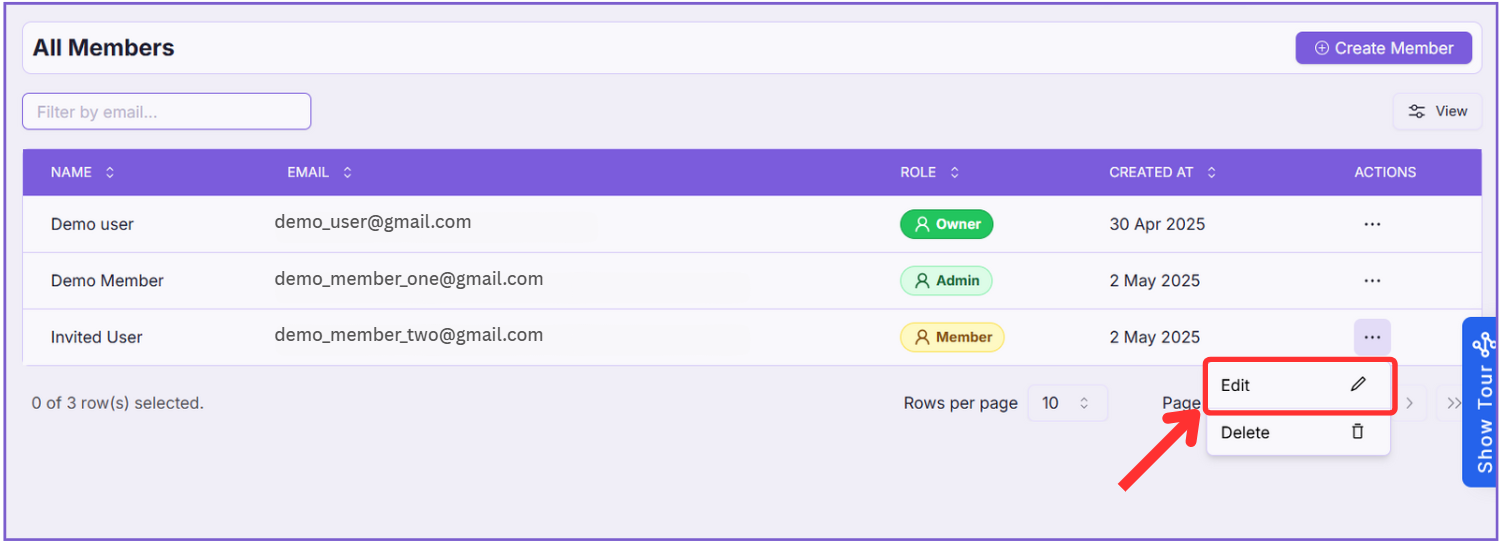
- On the Members page, you’ll see a list of your members.
For Verified Members: #

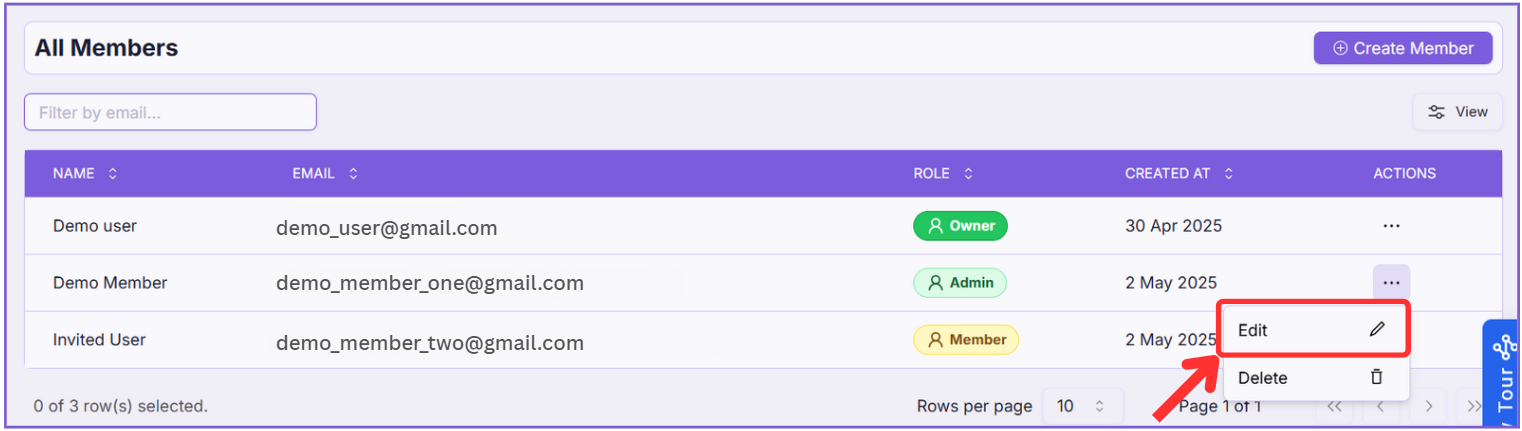
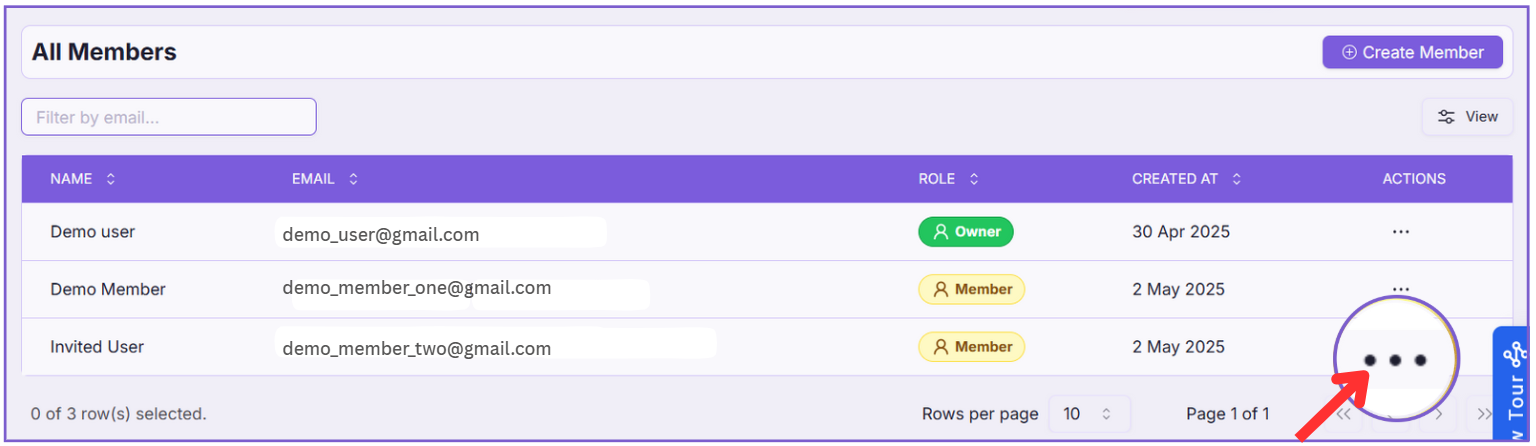
- Click on the action menu (three-dot menu ⋮) on the right-hand side of the member’s row you want to update.
- 1.1. Click on the “Edit” button in the dropdown menu that appears.
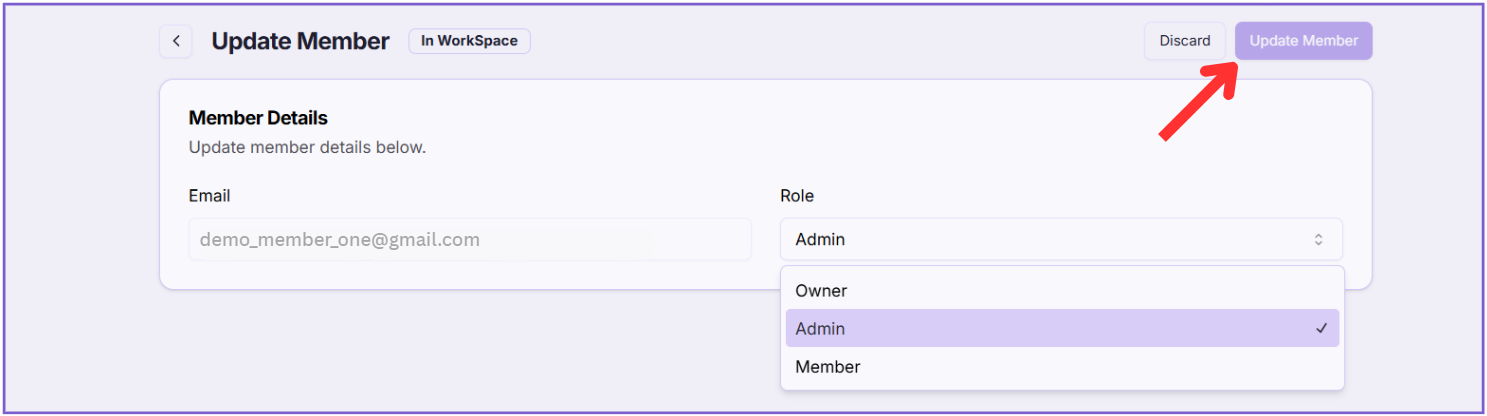
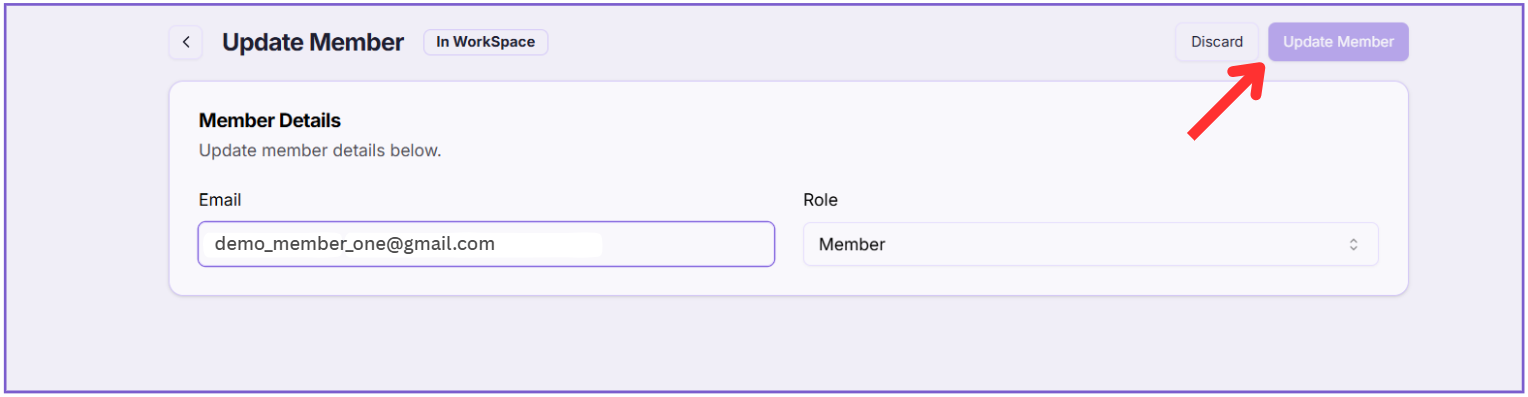
- Email: The email address of a verified member cannot be changed.
- 1.2 Role: You can change the role of a verified member using the Role dropdown menu. Again, be mindful of the role-based permissions
- 1.3. click Update Member to apply the updates.
For Unverified Members: #
- 2.1. Click on the “Edit” button in the dropdown menu that appears.
- 2.2 Email: You can update the email address of an unverified member in this field.
- 2.3 Role: You can change the role of the unverified member using the Role dropdown menu. Remember the limitations on who can assign which roles, as mentioned in the “Important Notes” above.
- After making the necessary updates:
- Click the 2.4 Update Member button located in the top right corner of the page.
Note: Your changes to the member’s information will be saved. If you updated an unverified member’s email, they might receive a new invitation to the updated email address.
- If you wish to discard any changes you made on the “Update Member” page, you can click the Discard button.